Whitelist Me!
It only takes a few seconds, I promise!
If you’re using any email client other than Gmail, visit whitelist.guide and choose your email provider.
If you are using Gmail, the only foolproof way to whitelist a sender is to create a filter that categorizes the sender’s emails as belonging in the Primary inbox. This is not complicated at all, and takes less than 20 seconds. (It can only be done in a browser, though, not in a smartphone app.)
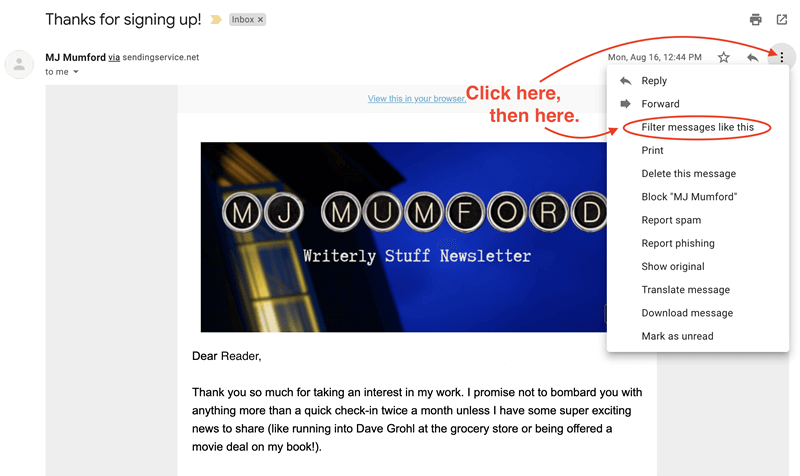
First, click the three dots in the right-hand corner of the email and choose “Filter messages like these.”
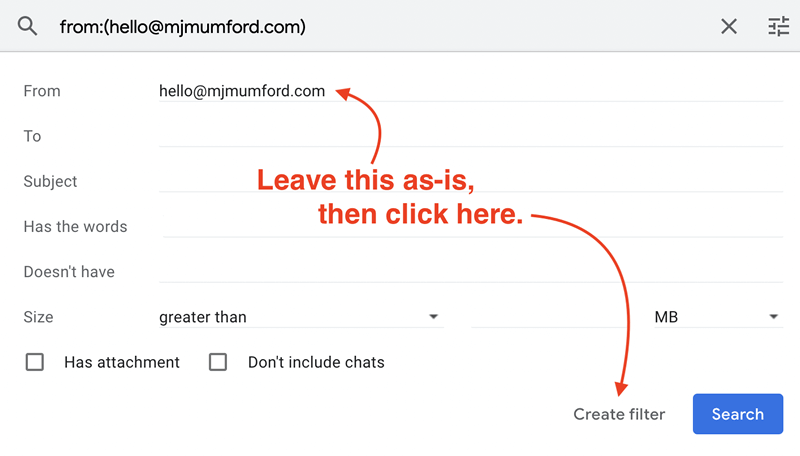
Then, make sure the “From” line says “hello@mjmumford.com” and click “Create filter.”
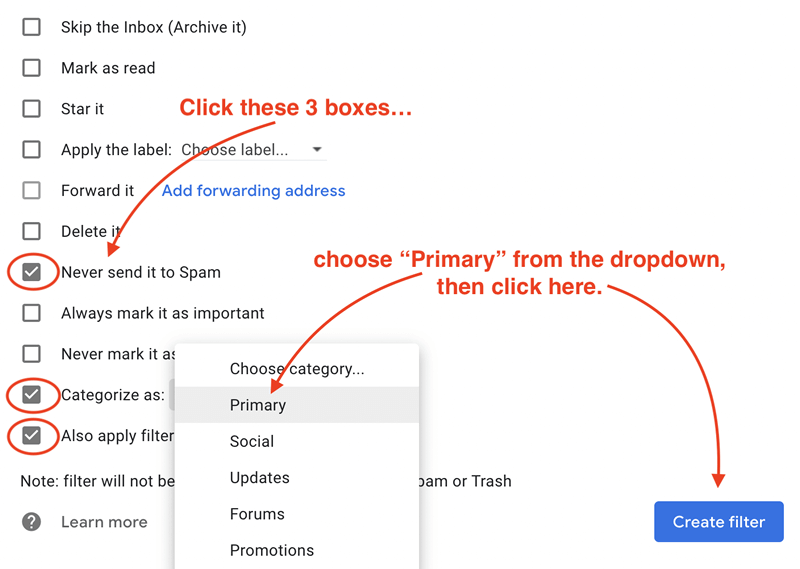
Finally, check the following boxes:
- Never send to Spam
- Categorize as, and select “Primary”
- Also apply filters to matching conversation(s)
and then click “Create filter” again.
That’s it! Now you can enjoy receiving the emails you signed up for.